In this article I will show how to host React web app on Azure cloud platform. We will create new test React web app from scratch, will build it, then will create in Azure new Resource group and App service and after that will transfer our React web app there. Before to start ensure that you have working Azure account with valid subscription (you may create free subscription for 1 month to try things out).
First of all we need to create React app. Before to do that you need to install nodejs on your PC. By default it will also install popular npm package manager and will add its folders to PATH env variable. When it is done run the following command in your working folder:
npx create-react-app test-react-app
It will create test-react-app folder and new test React app inside it. In order to test it on local dev web server run the following command:
npm start
It will launch web server and will open default browser with React app running on http://localhost:3000:

In order to host our React app on Azure we need to build it first. In order to do that run the following command:
npm run build
It will create ready for deployment build subfolder and will copy web app files there.
Once React app is ready we need to configure Azure for hosting it. Go to Azure portal https://portal.azure.com > Resource groups > Create resource group. On the opened window give name for the new resource group and select closer location:

When new resource group will be created choose New > Web App:
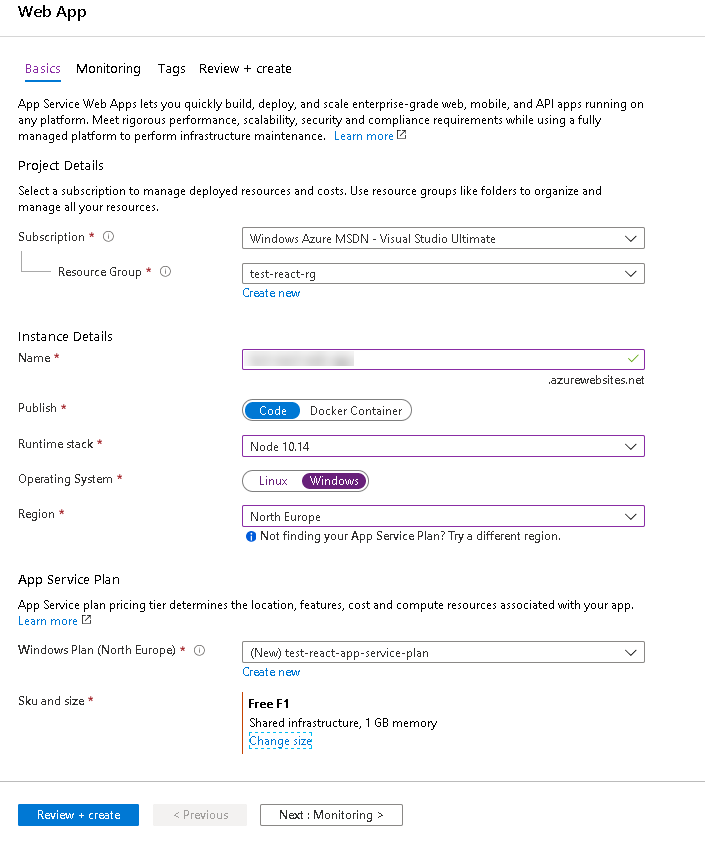
On the opened Window choose created resource group, give name for new web app, set the following parameters:
Publish = Code
Runtime stack = Node 10.14
Operating system = Windows
also select region (usually the same region which was used for creating resource group) and App service plan name. As we create new Web app for testing purposes we will use Free app service plan: under Sku and size click Change size and change App service plan to Dev/Test > F1 free:

and click Create. After that go to created App service > Deployment center > FTP > Dashboard > App credentials and copy FTP host name, username and password:

Use your favorite FTP client in order to connect to Azure app service with credentials copied on previous step. When connection will be established copy files from local /test-react-app/build folder to FTP /site/wwwroot folder. When it will be done try to open https://{name-of-your-web-app}.azurewebsites.net in web browser (instead of {name-of-your-web-app} use name of Azure web app which was used during it’s creation). If everything was done correctly you will see your React web app hosted in Azure:

No comments:
Post a Comment